Start a Worm Farm
- Details
 A worm farm is a fantastic way to minimize food waste by turning your organic kitchen waste into nutrient-rich fertilizer for your plants and soils.
Worms eat organic waste and turn it into liquid fertilizer and worm castings (the organic material that has been digested by the worms). Both of these products can be used on your garden and on your pot plants to keep them thriving.
You can use worm liquid to replace fertilizer. The liquid needs to be diluted until it is the colour of weak tea. This mixture won't burn your plants.
- Composting is another great way to reduce organic waste and improve soils.
- Turn your organic waste into a free source of garden fertilizer and soil improver
- Help reduce the amount of greenhouse gases produced in landfill
- Worms are easy pets to keep

Making a Worm Farm
Worm farming is a simple way of turning vegetable and fruit scraps into a great potting soil or soil amendment for your garden or house plants. It can be done year round, by apartment dwellers and home owners. Worm farming is particularly useful for people who would like to compost their food scraps but do not have space for a backyard compost bin.
Here is what you need to get started:
 Container of wood or plastic. We use a sturdy plastic container that is about 7 inches deep, 9 inches wide and 14 inches long. The measurements are not real critical. This just happens to be an easy size for us to keep around the office and carry to presentations. If you are going to keep your worm farm inside, you will want it to be water tight. The worms are going to be happier when kept in the dark. (Kind of like some folks around here.) If your container is clear, wrap it with newsprint or place it in a cabinet or a opaque container to seal out the light. Make sure that the place you find to store the bin is away from vibrations. Worms will try to pack their bags and move to better digs if they are too near a source of vibration.
Worms. We really suggest that you use red worms. They are also called red wrigglers or manure worms. Do not use earthworms or night crawlers. They just are not cut out to do this job.
Bedding material. Start with some shredded newspaper, moistened, not wet. Use the black and white pages. The classified ads are good, as are the stock market reports. Don't use the colored ad pages, it just makes the worms want to go shopping and you want them to stay in your box and convert the vegetable scraps. Add a couple of handfuls of garden soil, not potting soil, and a couple of crushed egg shells. Keep the bedding damp but not sopping. The moisture helps them to breathe, but too much water will drown them.
Food. You can feed your worms fruit and vegetable scraps and starchy scraps, like bread, oatmeal, and pasta. You can even feed them grits if they are southern worms, like ours. Do not feed them too much acidic foods, like citric fruits, coffee ground and tea bags. They do best with a pH between 7 & 8. You can use egg shells to balance the effects of coffee grounds, orange and lemon peels. Make sure that the eggshells are cooked before adding them to the worm farm. If they are not from boiled eggs, you can cook them by putting them in a cup of water in the microwave.

Never feed your worms meat, poultry, dairy products, or salty food, like potato chips. These will create odors and attract insects. Your worms will eat about half their body weight each day. Take this into consideration when you are deciding how much food to add to the bin.
- Worms require oxygen so keep the lid partially open to allow air to circulate. You should also turn the bedding with a trowel periodically to improve air circulation in the farm.
- Worms will function very well at room temperature. Keep the farm temperature between +40 degrees F and +85 degrees F. Remember that heat will build up quickly in the farm if it is left in the sunlight.
- Red worms reproduce often. Small, oval shaped cocoons in the bedding indicate that nature is taking its course. Cocoons may contain several baby worms and will take several weeks to hatch. Watch for tiny white worms. Poultry egg shells added to the bedding will provide calcium the worms need to reproduce. Don't worry about red worms taking over the estate; their population is limited by the size of their environment.
Farming worms:
Place the damp shredded newspaper with the garden soil and crushed egg shell in the container. Don't pack it down. Add the worms to their new home. If you leave the lid off and the light on, it will encourage the worms to investigate the new digs. Don't forget to add some worm food before you move the bin into the dark. You know you can get real hungry after the lights go out. Don't worry if hard foods don't disappear right away. They will have to soften through natural decay before the worms can eat them.
Do not over feed the worms. Overfeeding can lead to odor problems. As your worm population increases, you can add more food per day. Burying the food in the damp newspaper will keep mold from growing in the worm farm.
If your bedding is too wet, add some dry bedding, leave the cover off for a few days, or carefully drain the water off. If it is too dry, add some cool water and leave the farm loosely covered.
Soon you will notice an increase in the worm castings in your worm farm. This makes a great natural fertilizer. And all it cost you was a little time and some stuff that you were going to toss in the garbage.

When you see that bedding is no longer identifiable, you will want to harvest. Worms cannot survive in their own waste. Now if you are raising worms, you harvest the worms. We harvest the castings. The choice is yours.
Some folks sort the worms out of the castings and put the worms in fresh bedding. We have other things to do with our time and prefer a split harvest method. It helps if you have trained your worms ahead of time for this harvest method.
To train your worms, you start feeding them at only one end of the bin. Do this for about a week. (Worms learn pretty fast.) Now take the bedding/castings out of the end of the farm where you were not feeding them and add it to your plants or garden. You will be removing about half to two thirds of the bedding/castings in this step.
You will lose some worms, but those were the ones that were not very smart. Remember you trained the others.
Place the remaining bedding/castings in a container while you scrub the bin and fix new bedding. Prepare this bedding the same way you did the first time, damp newspaper, crushed egg shells, and a handful of dirt.
Now add the worms you trained, castings and all onto the fresh bedding. Feed and you are back in business. I have found that the worms will move out of the old bedding in a couple of days. If you want a cleaner farm, you can remove the old bedding in a few days.
Copyright © 2008, Louisiana Department of Environmental Quality. All rights reserved.
Source Here
Here are some Helpful Videos for Those DIY Folks:
How to Make a Basic Worm Composting Bin
How to Make a Worm Farm
Maintaining your Worm Farm

Liked this article? Dive deeper into personal growth and wellness! Check out CrystalWind.ca for spiritual wisdom or explore AromaWorx.ca for natural well-being tips. Spread the positivity—share this with friends on their happiness journey!
Let’s Chat! Drop Your Thoughts Below! ![]()


Latest Articles


Dive into the Mystical World of the Crystal Wind Oracle Deck!
Get All the Enchanting Details Now!
NEW Expanded Boxed Edition!
Now with 58 Cards for Richer Wisdom!


Imagine a world of inspiration and healing, free for all—made possible by YOU!
Donate Now—Ignite the Magic at CrystalWind.ca!


Epilepsy - Finding A Cure
Your donation can make a difference!
Help us find a cure – donate now!
Unlock Your Light: Join Lightworkers Worldwide on CrystalWind.ca!
Call For Writers

Follow Us!
Featured This Month
Page:


Crystals for Virgo

As the warmth of summer begins to soften into the crispness of autumn, the Sun... Read more
Sweet Violet

Sweet Violet Faithfulness and modesty. “I will always be true to you.” Helps... Read more
Sun in Virgo

An Overview of Sun Sign Characteristics for Virgo Virgo is guided by Mercur... Read more
Virgo Mythology

The Virgo Myth In all of constellation mythology, few legends are as misund... Read more
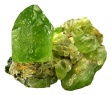
Peridot: The Healer's Stone
Peridot has been used as a Power Stone for centuries. Peridot fosters emotio... Read more
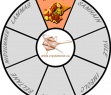
The Vine: September 2nd - September 29th

The Autumnal Equinox ( Alban Elfed ) Celtic Symbol : The White Swan Read more

Watermelon Tourmaline
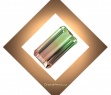
Synonym: Rainbow Tourmaline The watermelon tourmaline is a rare variety t... Read more

Mabon Magic: Ideas For Fall Decoration And R…

Welcome (almost!) to Fall! We’re turning the Great Wheel once again, toward ... Read more
Mabon in Modern Times: Fresh Takes on the Au…
The Mabon season begins somewhere around the 21st-22nd of September and cont... Read more