4 Step Guide to Building a Herb Spiral
- Details

Want to make your own vertical herb spiral garden? This compact space saving design can be made with just a few basic steps.
Construction materials and methods vary so after deciding on the best position and gathering your materials, you can have one built the same day.
Depending on your budget and taste, herb spirals can be made very economically or be quite elaborate like this one with stone filled gabion walls.
Think of this as a typical ‘recipe’ you can follow, substituting ‘ingredients’ you have handy.
Materials you’ll need
Cardboard (without ink or tape), weed mat or gravel – optional but useful to kill weeds if building your spiral straight on top of lawn. (I avoid carpet because it’s likely been treated with chemicals that will leach into the soil as it breaks down). Alternatively, you may need a drill for drainage holes if building on concrete.
Long stake. Secure a 1m length of string to the stake and tie at the other end with a lightweight stake, bamboo cane or chalk. Use this to draw a line on the ground to measure out the circle.
Edging Materials e.g. bricks, pavers, stones, rocks – choose long-lasting materials for a permanent structure.
Organic Matter such as mushroom compost, worm castings, lucerne, mulch, straw and garden soil to build fertility to feed your garden long term (quantity depends on diameter of your spiral).
Compost (for planting your herbs into – preferably homemade so it will be full of living microorganisms or alternately, a certified organic compost).
Mulch (whatever you have available) e.g. lucerne, sugarcane, baled grassy mulch hay, pea straw, grass clippings, leaves, etc.
Herb Seedlings; bay tree and vegetable seedlings if planting.
(Optional) pond materials and irrigation fittings if including.
Location
Locate your herb spiral close to the kitchen for easy harvesting.
Choose a spot that ideally receives 5 full hours sun/day and is close to your kitchen for easy access.
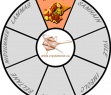
Orientate your pond or bottom of the spiral on the southern side in the Southern Hemisphere and northern side in the Northern Hemisphere. When it comes to planting, this will allow you to position your plants according to their sun, shade and water requirements.

Herb spiral with compass points
How to Build Your Spiral
STEP 1: Measuring up – Have someone hold or bang the stake into the central point of the ground where you want to position your herb spiral. To determine the perimeter, stretch out the string attached to the centre stake to mark out your circle, drawing a line in the soil with the other stake or bamboo cane tied on the end of it (or use chalk if you are marking out a hard surface).

Measuring out a herb spiral
An alternative method for marking out your spiral.
The diameter averages between 1.5 – 2m (5 – 6.5 ft) or 750cm – 1m (2.5 – 3.25 ft) from the centre.
Tip: If building straight on top of concrete, make sure you drill holes or have adequate drainage.
STEP 2: Your base – if starting on lawn you will need to stop weeds from growing. Cardboard can be used for this purpose to sheet mulch and build the spiral on top. No light = no weeds! Some people use newspapers or thick phone books instead but I choose to avoid adding anything to my organic garden with inks that may be based on genetically modified soy beans. Cardboard edges need to be well overlapped to block all light.

Cardboard base laid for a herb spiral to block weeds.
Cardboard is easily accessible for free from most businesses that pay to have it taken away and recycled and we can tread a little lighter on the planet at the same time!
Lay your weed mat or wet cardboard (soak with a hose or in a wheelbarrow) to cover the circle you have marked out. Cardboard will breakdown and add carbon to your soil and provides a food source for microorganisms. You may also choose to add some organic matter under this to accelerate breakdown of the cardboard such as chopped vegetable scraps and other green waste from your garden.

Herb spiral base pegged out, laid with drainage gravel & pond positioned.
STEP 3: Construct the wall structure – Using your edging material of choice, start laying your bricks/rocks on the outer edge and working inwards to create a spiral shape, allowing about 0.5m (1.6 ft) width to plant into or adjust if making a smaller spiral.

Laying out the basic shape of the spiral on top of the gravel base.
To minimize your cost and time, use the dry stone wall method where rocks or bricks are laid on top of each other, overlapping for stability.
For a more formal look, use mortar or cement between your bricks or stones.
Tip: Save your best looking materials for the outside ‘face’ and those that will not be seen on the inside of the spiral.
If using heavy rocks or stone, you may prefer to dig a shallow trench around the circumference of the circle and lay these into it on top of a layer of cardboard or weed mat to prevent weeds.
If using the dry stone wall method, you may find it easier to add your organic materials as you go to provide support rather than adding these at the end for the mortar method.
Once you have your basic shape laid out around the circumference, add a second tier of bricks, remembering the outside ‘wall’ of your spiral is lowest (e.g. 2 bricks high or perhaps 1-2 rocks depending on size – enough to retain your soil).
Use more bricks or rocks to build the internal spiral walls, gradually increasing the height as you work your way into the centre.
The middle will usually end up about 1m (2.5 ft) high with a central planting area, gradually tapering down in height on a light slope to the bottom. You can block it off or add your bog/pond at the base if using.

Filling up base with rubble
To minimize the quantity of organic materials required, you may prefer to add some rubble to the centre where the depth is greatest before adding your organic matter.
STEP 4: Add your organic materials & nutrition – for each of us this will be different, depending on what you have easy access to. Some people only add mulch or straw to their herb spiral and plant into pockets of compost. If you’re on a tight budget or this is all you have access to, then this system of ‘growing soil’ will work fine but ‘dead dirt’ is unlikely to bring you a successful outcome!
“Like humans, plants thrive on good nutrition.”
Rather than buying in a trailer load of soil from your landscape yard, you can make your own soil teaming with living microorganisms. Soil that has a good structure (a crumbly fine texture that holds moisture well) is ideal for healthy productive plants.

Layering organic matter into the spiral.
To achieve this, add different kinds of organic matter that will break down over time, feeding your plants rather than just garden ‘dirt’ which tends to compact & provides little nutrition.
These organic ingredients are likely much cheaper than buying in soil too!
Good sources of organic matter that will build soil fertility include:
- well rotted manure
- mushroom compost or even better, your own compost
- lucerne, sugarcane mulch and straw mulches all add organic matter to build soil
- worm castings from your worm farm
- moistened coconut fiber; and
- for lower layers use materials like leaf litter, well chopped prunings and dry grass clippings.
- leaves from gutters are rich in nutrients & a free resource you can use to build your garden.
Sprinkle rock minerals (crusher dust from your landscapers is also suitable and very economical) and organic fertilizers as you add the organic matter to build in nutrients as a food source.
Soil Nutrition: Adding plant food that will release nutrients slowly while you build the spiral will reduce maintenance to a minimum.
If you have access to biodynamic preps you may choose to add these too. To assist breakdown and ensure there is enough moisture, water in each layer with liquid seaweed. Expect some natural settling to occur.
Tip: It’s a good idea to check the pH balance of your organic matter – it may be necessary to sweeten the soil with some dolomite lime if the pH is too high.
Moisture loving plants at the bottom of the spiral will thrive if you include some (optional) additional moisture holding ingredients like coconut fiber (coir peat), sphagnum moss, worm castings or some well aged compost (humus).

Herb spiral planted out with a pond.
Once your herb spiral is built, you will be ready to plant it out.
To add a water garden at the base, dig out a hole and add black plastic to line it. You can use any container that will hold sufficient water and grow water loving species like water chestnuts and cress. Alternatively if you live in a dry climate, use the ‘pond’ as a reservoir to water the garden from.
Herb Spiral with Pond
Tips for Building Your Herb Spiral
To fill gaps in the perimeter curves of your spiral, use small, cut or broken bricks and stones.
You can fill niches with ground covers like oregano or pennyroyal. Sphagnum moss can be pushed into gaps up the wall and a small amount of compost tucked inside to plant into. Or make a seed ball with some compost, a little clay and moist coconut fiber (coir peat) rolled up with seeds inside and push against the wall into the crevice. When the seeds are moist they will germinate and grow into the gaps.
Finish with decorative and smaller stones, rocks or bricks at the top.

Giant herb spiral with 50m pathway
For parks, playgrounds, schools and community gardens where you may want to build a larger spiral, adapt the design to build it on ground level instead. Allow enough space for a pathway alongside the planting area so instead of reaching in to the centre for easy access; you can walk around the spiral to pick your herbs.
Before & After – Some Inspiration!

A herb spiral - before & after 12 months
LEFT: When spiral was first planted | RIGHT: After 12 months – depending what plants you grow, the edging may not matter!
Really cramped for space? You can still design a mini sized herb spiral!


Herb spiral on a small allotment.
A clever way to maximize space on a small allotment garden!
Bamboo & Rock Herb Spiral - Before & After

An alternative building method – with a pile of soil in the centre, then adding bamboo stakes & rock borders.
Herb Spiral - (Building) Part 1
Herb Spiral - (Planting) Part 2
Source Here

Liked this article? Dive deeper into personal growth and wellness! Check out CrystalWind.ca for spiritual wisdom or explore AromaWorx.ca for natural well-being tips. Spread the positivity—share this with friends on their happiness journey!
Let’s Chat! Drop Your Thoughts Below! ![]()


Latest Articles


Dive into the Mystical World of the Crystal Wind Oracle Deck!
Get All the Enchanting Details Now!
NEW Expanded Boxed Edition!
Now with 58 Cards for Richer Wisdom!


Imagine a world of inspiration and healing, free for all—made possible by YOU!
Donate Now—Ignite the Magic at CrystalWind.ca!


Epilepsy - Finding A Cure
Your donation can make a difference!
Help us find a cure – donate now!
Unlock Your Light: Join Lightworkers Worldwide on CrystalWind.ca!
Call For Writers

Follow Us!
Featured This Month
Page:
Crystals for Virgo

As the warmth of summer begins to soften into the crispness of autumn, the Sun... Read more
Sun in Virgo

An Overview of Sun Sign Characteristics for Virgo Virgo is guided by Mercur... Read more
Watermelon Tourmaline

Synonym: Rainbow Tourmaline The watermelon tourmaline is a rare variety t... Read more
Sweet Violet

Sweet Violet Faithfulness and modesty. “I will always be true to you.” Helps... Read more


Peridot: The Healer's Stone
Peridot has been used as a Power Stone for centuries. Peridot fosters emotio... Read more

Mabon Magic: Ideas For Fall Decoration And R…

Welcome (almost!) to Fall! We’re turning the Great Wheel once again, toward ... Read more
Mabon in Modern Times: Fresh Takes on the Au…
The Mabon season begins somewhere around the 21st-22nd of September and cont... Read more
The Vine: September 2nd - September 29th

The Autumnal Equinox ( Alban Elfed ) Celtic Symbol : The White Swan Read more

Virgo Mythology

The Virgo Myth In all of constellation mythology, few legends are as misund... Read more