How to Make Your Own Incense for In-Home Aromatherapy
- Details
- Written by Samantha Higgins
- Views: 1895

Creating your incense for in-home aromatherapy can be a deeply rewarding experience.
Not only does it allow you to customize the scents that fill your living space, but it also connects you to ancient practices that promote relaxation and well-being. Handmade incense can be tailored to your personal preferences, combining the aromas that bring you peace, focus, or energy. The process of making incense is both an art and a science, requiring a thoughtful selection of ingredients and careful craftsmanship. By understanding the essential steps involved, you can craft incense that enhances the atmosphere of your home.
Selecting Your Ingredients
The first step in making your incense is choosing the right ingredients. The primary components include a base, binder, and aromatic materials, each playing a crucial role in the final product. The base, often a neutral powder like sandalwood or charcoal, helps the incense burn evenly. The binder, such as mako powder or natural gums, holds the mixture together and ensures it forms a solid shape. Aromatic materials, including essential oils, herbs, and resins, are what provide the scent. Selecting high-quality ingredients will significantly influence the fragrance and burning quality of your incense.
Mixing and Blending
Once you have your ingredients, the next step is to mix and blend them properly. Start by grinding your aromatic materials into a fine powder, as this ensures a smooth and even burn. The ratio of base to aromatic material can be adjusted depending on the intensity of the scent you desire. A common ratio is two parts base to one-part aromatic material. Add the binder gradually while mixing until the mixture holds together when pressed. Blending the ingredients thoroughly is essential for achieving a consistent scent and burn rate, so take your time during this step.
Forming the Incense
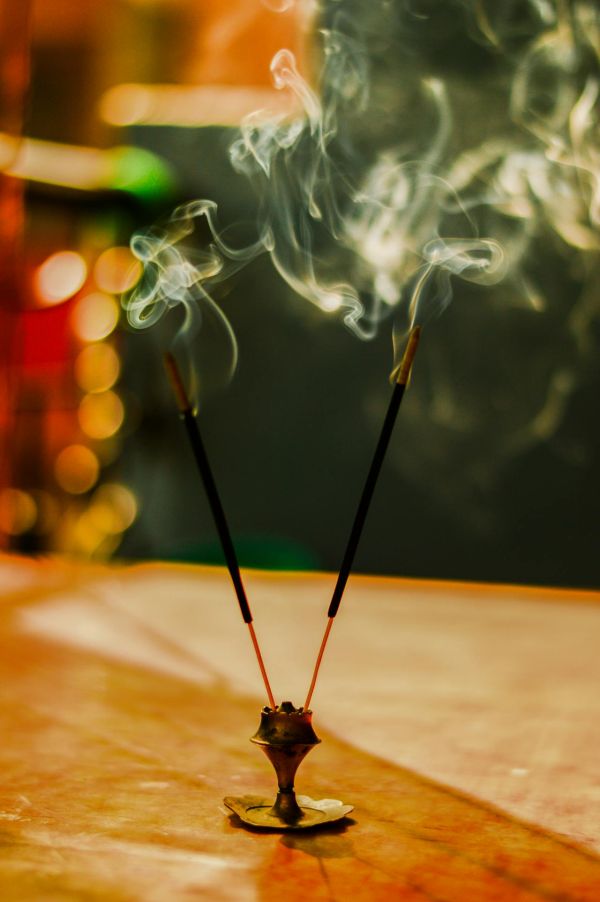
After mixing your ingredients, the next step is to form the incense into your desired shape. Incense can be shaped into cones, sticks, or loose powder, each offering a different burning experience. For sticks, roll the mixture around a bamboo skewer, ensuring an even coating. Cones can be formed by pressing the mixture into small, pyramid-like shapes. Loose incense is simply left as a powder to be burned on charcoal discs. The key is to compress the mixture tightly to avoid crumbling and ensure a slow, steady burn. Allow the formed incense to dry completely before use, which can take several days.
Drying and Storing Your Incense
Proper drying and storage are crucial for maintaining the quality of your homemade incense. Place the formed incense in a dry, well-ventilated area, away from direct sunlight, to allow it to cure. The drying time can vary depending on the size and shape, but it typically takes one to two weeks. Once dried, store the incense in an airtight container to preserve its scent and prevent moisture absorption. Keep the container in a cool, dark place to maintain the fragrance and burning quality. Properly dried and stored incense can last for several months, retaining its aromatic properties.
Look Out for Courses
When creating your incense for in-home aromatherapy, it is beneficial to look out for courses that offer detailed instruction on the subject. These aromatherapy courses can provide you with valuable knowledge on essential oils, blending techniques, and the properties of different ingredients. Gaining insights from these educational resources can enhance your understanding and skills in crafting incense that effectively supports your desired therapeutic outcomes. Additionally, these courses often include practical demonstrations and expert tips that can help you refine your techniques. By leveraging the expertise available through these courses, you can achieve a higher level of proficiency in your aromatherapy practices.
Customizing Scents for Different Moods
One of the joys of making your incense is the ability to customize scents to suit different moods and purposes. By experimenting with various combinations of herbs, resins, and essential oils, you can create incense that energizes, relaxes, or purifies your space. For a calming effect, try using lavender, chamomile, and sandalwood. For a more refreshing aroma, blend citrus oils with rosemary and pine. The possibilities are endless, and by understanding the properties of different aromatic materials, you can craft incense that aligns with your needs and preferences. Keep a journal of your experiments to refine your recipes over time.
Conclusion
Crafting your own incense for in-home aromatherapy is a fulfilling and creative endeavor. By selecting quality ingredients, carefully blending them, and forming your incense with precision, you can create a product that enhances your living space with personalized scents. Proper drying and storage ensure that your incense retains its aromatic properties, allowing you to enjoy the fruits of your labor for months to come. The ability to customize scents for different moods adds a layer of satisfaction, as you can tailor your incense to suit your emotional and mental state. With patience and practice, you can master the art of incense-making, transforming your home into a sanctuary of soothing aromas.
This article was submitted exclusively to CrystalWind.ca by Samantha Higgins. Do Not Copy.
Bio:
Samantha Higgins is a professional writer with a passion for research, observation, and innovation. She is nurturing a growing family of twin boys in Portland, Oregon with her husband. She loves kayaking and reading creative non-fiction.
The original article is copyrighted by the author listed above. Posted on CrystalWind.ca ©2024. All rights reserved. Reproduction of this content is prohibited without written permission. The title of the article was created by CrystalWind.ca.
Liked this article? Dive deeper into personal growth and wellness! Check out CrystalWind.ca for spiritual wisdom or explore AromaWorx.ca for natural well-being tips. Spread the positivity—share this with friends on their happiness journey!
Let’s Chat! Drop Your Thoughts Below! ![]()
Disclaimer Health
All post and information provided within this blog is for educational and informational purposes only, and is not to be construed as medical advice or instruction. No action should be taken solely on the contents of this website. Please consult with your healthcare professional before making any dietary or lifestyle changes or taking supplements that may interfere with medications. Any products or information discussed are not intended to diagnose, prevent, treat or cure any illness, disease or lifestyle. Please consult your physician or a qualified health professional on any matters regarding your health and wellbeing or on any opinions expressed within this website.

Imagine a world of inspiration and healing, free for all—made possible by YOU!
Donate Now—Ignite the Magic at CrystalWind.ca!

Epilepsy - Finding A Cure
Your donation can make a difference!
Help us find a cure – donate now!
Unlock Your Light: Join Lightworkers Worldwide on CrystalWind.ca!
Articles: Aromatherapy
Follow Us!
Featured This Month
Mabon Magic: Ideas For Fall Decoration And R…
Welcome (almost!) to Fall! We’re turning the Great Wheel once again, toward ... Read more
Sweet Violet
Sweet Violet Faithfulness and modesty. “I will always be true to you.” Helps... Read more
Virgo Mythology
The Virgo Myth In all of constellation mythology, few legends are as misund... Read more
The Vine: September 2nd - September 29th
The Autumnal Equinox ( Alban Elfed ) Celtic Symbol : The White Swan Read more
Crystals for Virgo
As the warmth of summer begins to soften into the crispness of autumn, the Sun... Read more
Watermelon Tourmaline
Synonym: Rainbow Tourmaline The watermelon tourmaline is a rare variety t... Read more
Peridot: The Healer's Stone
Peridot has been used as a Power Stone for centuries. Peridot fosters emotio... Read more
Sun in Virgo
An Overview of Sun Sign Characteristics for Virgo Virgo is guided by Mercur... Read more
Mabon in Modern Times: Fresh Takes on the Au…
The Mabon season begins somewhere around the 21st-22nd of September and cont... Read more


